
Catalog structure is a key factor in a document archival system. In Mayan EDMS we can use a fixed structure that we create or we can use a dynamic structure that can depend on the value of a metadata field.
I. Cabinet
If you want to use a predefined folder structure like the one you create in your computer with a file manager then you use ‘Cabinets’.
How To
First level is created by using:
[left-menu] > Cabinets > Create cabinet
Type the Label. Click ‘Save’
For Level 2:
In ‘Cabinets’ page.
On your recent [item option] click on the ‘Add new label’ button
Type the Label. Click ‘Save’
For further levels:
On your [item option] click on the ‘Details’ button
Select the level you want on the ‘Details of cabinets’ page.
Click on the ‘Add new level’ button
Type the Label. Click ‘Save’
To use a cabinet, on the file upload Step 4, you’ll select one or several ‘Cabinets’ from a drop down list:
Level 1
Level 1 / Level 2
Level 1 / Level 2 / level 3
This will not be implemented in our example.
II. Index
There is a better way to classify your documents, that is an automatic structure. You can use values on the metadata and the document will end up there. If you change the values, the file will be reclassified.
An example could be: 1st level is the Department and the net level would be the date received. The file will be named with the Claim number.
How to
We need to define a ‘Tree template’, first the Name or Label that we will use to refer to it:
- [System-Select] > Setup
- Click ‘Indexes’
- [Action-Select] > Create Index
- Type:
Label: Claims
Slug: claims
Keep check on ‘Enabled’
Click ‘Save’
Now lets define the first one will be the department:
- [System-Select] > Setup
- Click ‘Indexes’
- Click on the ‘Tree Template’ button on the ‘Claims’ [Item option]
- Click on the ‘New child node’ button
- Type in Template:
{{ document.metadata_value_of.department }}
Keep the check mark in ‘Enabled’
Click ‘Save’
For the second level will be based on reception date in the format year-month:
- Click in the button ‘New child node’ (on the new level)
- To extract the data that is stored in the date field with the format: YYYY/MM/DD, type in the template:
- {{ document.metadata_value_of.dReceived|slice:”0:4″ }}-{{ document.metadata_value_of.dReceived|slice:”5:7″ }}
Keep the check mark in ‘Enabled’
Mark ‘Link documents’.
As the text explains that instruct Mayan to put the document link here.
Click ‘Save’
The last step is the association of this Index structure to be used with the ‘Document type’: Claim
- [System-Select] > Setup
- Click ‘Indexes’
- On the Claims [option] click in the button ‘Document types’
- In the next page
Select ‘Claim’ from the left panel
Click on the button ‘+Add’
The index will be built when you upload your first document.
III. Tags
Tags allow to identify documents easily. You can even use colors. In our example I’m using two TAGs, one to identify the state used by the analyst and one for the Expert so they can locate documents tagged for them in the workflow.
Note: When you design your workflow you usually model the activities (States) and Transitions, then you elaborate tagging. But for this post the introduction of Tags came first. In the Workflow section we will see how to automate tag’s setting and removal.
How To
- [left-menu] > tags > Create new tag
- Type in the ‘Create tag’ page:
Label: Name
Choose a color
Click button ‘save’
| Label | Color |
|---|---|
| On Claim Review | Orange |
| On Expert | Green |
I associate Tags to a State so a user can click on it to find documents on that state. You only need two clicks to check the number of documents with a tag:
[left-menu] > Tags > All
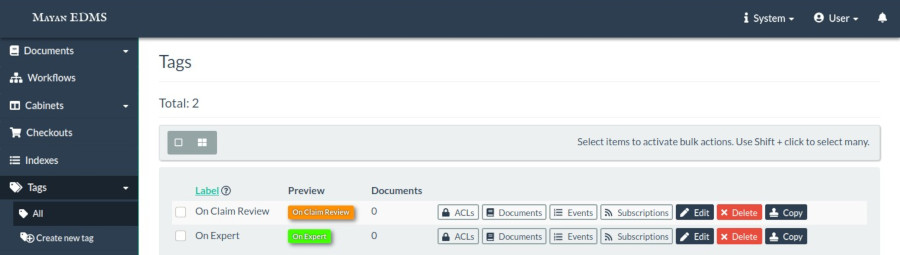
To reduce the number of buttons available for your users in the image above we will use permissions so they will only see the number of documents and the ‘Documents’ button.
